
I have spent nearly 50 years taking photographs, for forty years I was actually paid to take photos. For about half of those years I was paid to teach photography. Having said that, I am still learning how to take a decent photo.
One of things I’ve learned is that most great photos are the result of actual work that often includes physical discomfort. You do not see that in the photograph, but it is there.
I would be remiss if I didn’t include the quick snapshot that just “presented” itself, no planning, no work, just an accident of having a camera at the ready. My problem as an instructor is to tell people that “intentional” shooting will always create a great photo if your planning is successful. No need to wait for the perfect shot.
The following is a typical “shooting plan”…
1. Critically analyze the choosing of the best camera depending upon the required circumstances.
2. Evaluate the use of film or digital for the specific need of the image.
3. Distinguish the advantages of automatic settings over manual (or vice versa), and how the relationships between ISO, shutter, and aperture effect the image.
There are hundreds of camera designs and styles, far too many to describe here, but there are some basic designs.
In the film world I will break it down into camera designs based on the film size that is used.
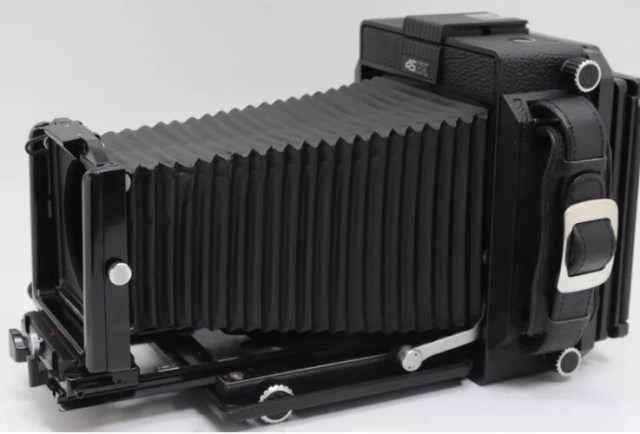 Large Format, the classic wooden box, bellows, lens board, and a black cloth to cover the photographer while they look at the image on a ground glass screen. They can be 8.5×11 film size, but the more classic is 4×5 inches. Incredible resolution! Landscapes and portraits are popular in this format, because of the longer set-up time, which forces better planning.
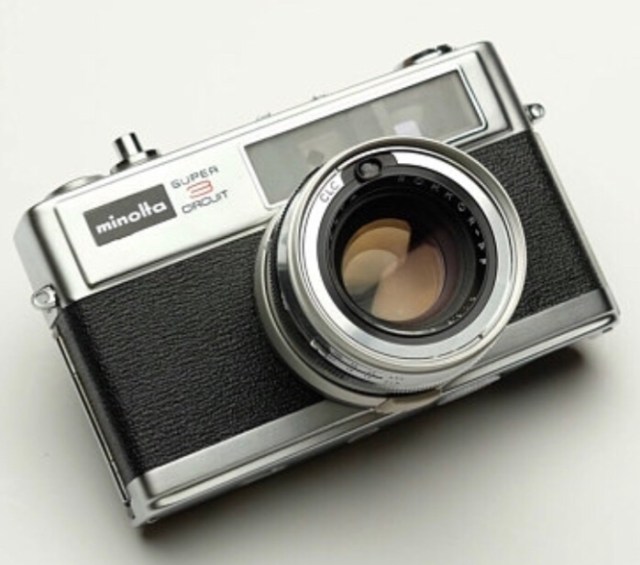 Rangefinders are another alternative to DSLRs, except that the viewfinder does not pass through the lens. This can be a problem if the lens cap is not removed, the photographer can take a whole roll with no images. This type of camera made the 35mm film famous. On the early cameras the focus was set manually. You had to know your distances. Today, it is often seen as retro and cool, but the quality of the older lenses are remarkable.
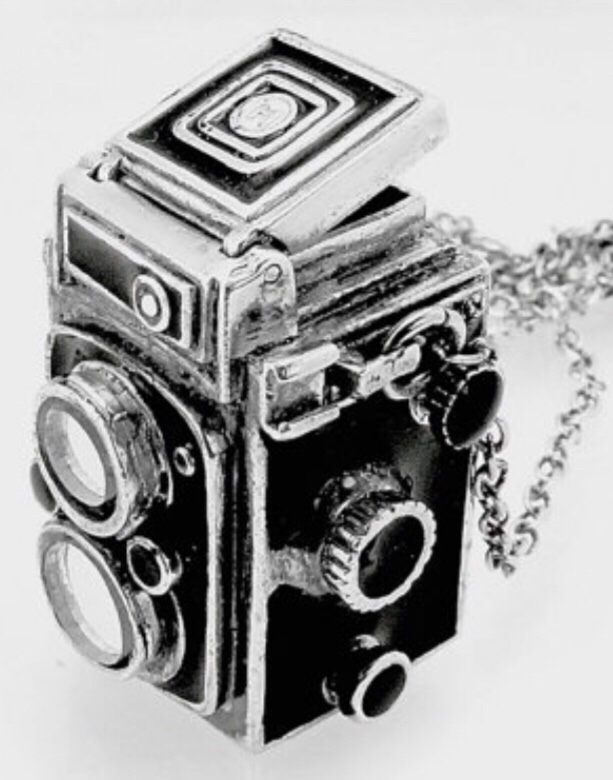 Twin lens reflex cameras generally used a roll consist of 2×2 inch negatives, not as good as the large format cameras, but far better than the 35mm rangefinders.
Similar to the rangefinder, the photographer would look through one set of lenses, and the actual image would be taken by another set. This created a potential parallax problem that got worse the closer the camera was to the subject. The two lenses were set close together, but there was still a difference. The good thing was that when you focused the viewing lens, you automatically focused the taking lens. Photographers love the larger film and better resolution.
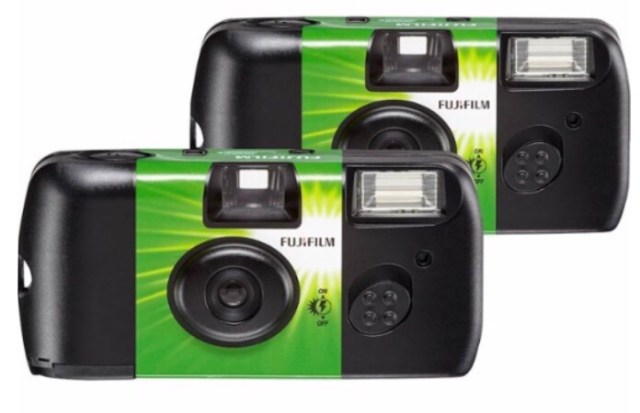 Disposable cameras were often loaded with cassettes of film. Negatives that were much smaller than 35mm, and with few controls on the camera. There was no focus because the camera had a very tiny aperture, a small pinhole. Images are almost always in focus with pinholes, unless there is movement of the camera. The problem is that the pinhole lets in very little light, so shooting inside, under low light conditions, was very difficult. A small flash was usually included, but the flash only lit the first 6 to 8 feet. The best that can be said is that the disposable was easy to carry and always available.
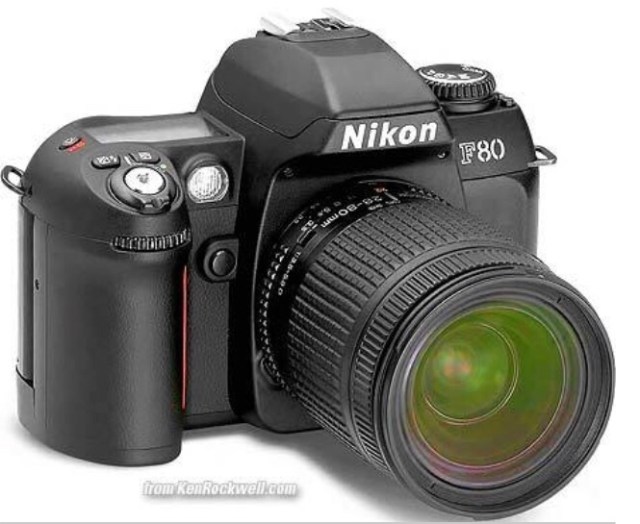 SLR cameras became the standard for photographers. They could be made for larger film, but most of them were made for the 35mm size film. The standard classic image of a camera today follows the shape of a SLR body. The body houses manual and electronic controls and a mechanism that moves the film from one side of the camera to the other. As the film is rolled from left to right it stops in the middle of the body where the shutter opens to expose the image coming through the lens. The image is normally reflected up through the prism where the eye can see the proper framing.
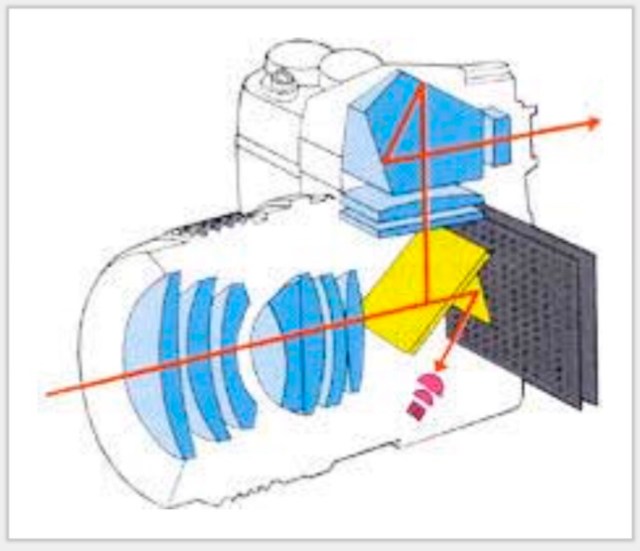 When the photographer is satisfied, the mirror bounces out of the way, and the image/light falls on the film for as long as the shutter is open. It is a wonderful design that keeps the film safe from light, even if the lens is removed to replace it with another. Photographers gather a collection of lens that meet different photographic needs. Some are better for distance, some are better for portraits, some are better for low light.
Ideally the photographer would want the best of all needs in one lens. Unfortunately that isn’t possible because of physics. However there is a compromise that solves most problems, and that lens is called “your walk around” lens. Good for most things.
The real power of the SLR was the full range of manual/automatic controls, and the swappable lens. Everything was adjustable even if the film size was small.
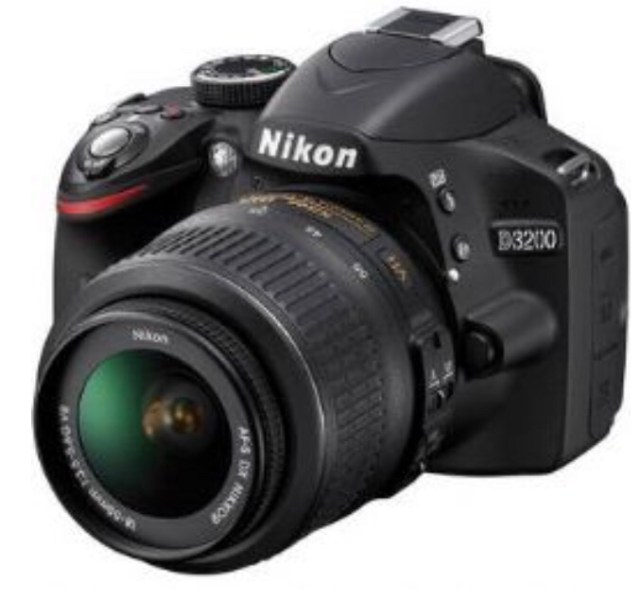 A very popular choice today is to purchase a 35mm style digital camera. This camera has a digital sensor in place of the film plane. There are digital large format and digital twin lens cameras, but they not very popular with the public, because of the expense of a large photo sensor.
Over the last few years the sensors have been improving in resolution, and more importantly the camera body’s have been improving as well.
One of the huge drawbacks to digital images is the inherent noise that is often present. While this noise can be the result of a number of factors, the most common is the sensitivity of the sensor.
This sensitivity is codified by the ISO rating that is set by the photographer.
Most digital cameras have a sensor that begins at ISO 100 or ISO 125. This is a great setting for normal light outside.
The first digital cameras had adjustments to raise the ISO to 400, to increase the sensitivity for indoor shots without a flash.
The problem was that a random noise pattern would also appear in the image. It was so bad that I often recommended to never set the camera at the highest ISO setting because of this noise.
That is not so much the case now. Most new cameras have better sensors in resolution but also in noise suppression. In fact, the improvement is so radical that I advise buyers to buy the new cameras even if the old models are working perfectly.
Another great advantage is that the new digital cameras can easily mount the older film camera lens that you might already have. In fact, I am always on the hunt for “old glass”. Some may not have the automatic focus or exposure controls of newer of the newer lens, but I like to shoot manually so I don’t care!
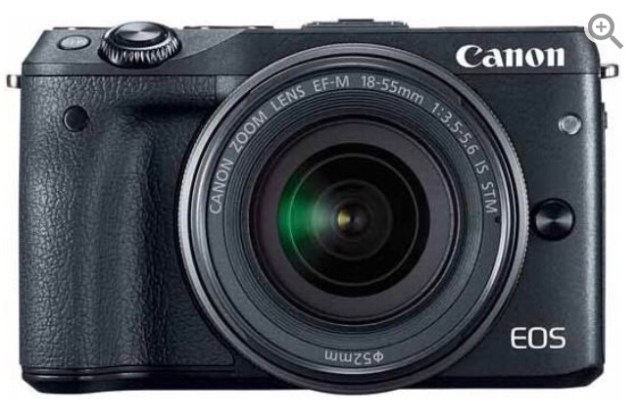 A newer addition to the types of digital camera is called in common terms “the mirrorless” cameras. They can be recognized easily by the lack of the prism “hump” that is necessary for cameras with a mirror.
The immediate advantage is that the camera is smaller. The burden of carrying a large digital camera in order to get the quality desired is still a factor.
Another less obvious advantage is the quiet. The combination of the mirror flop and the shutter click can created a lot of noise. In some venues this can be a tremendous distraction. Not only are the subjects aware that a photograph has just been taken, but the bystanders can also be disturbed by the sound. Imagine being in a theatre where someone is firing a continuous stream of pictures during a dance recital.
One last possible advantage is the reduction of “shake” during very long exposures.
The problems of mirrorless cameras also need to considered. It is lighter and possibly more susceptible to movement. There can be the issue of having to buy more lenses that can’t be used on other cameras. All in all, the mirrorless choice can be a very good one, particularly if camera mechanical noise is an issue.
 There are still a number of high quality digital “point and shoot” cameras on the market. They often can be recognized by the collapsing lens when the power is shut off. The sales of these cameras have dipped seriously because they have mostly been replaced by the smart phone.
 Smart phone or tablet cameras are now common and the resolution is remarkable. Most of theses cameras suffer from the lack of manual controls and the inability to change lens. The automatic controls are often more sensitive than the automatic controls of SLR digital cameras.
Film or digital?
The answer is always “it depends!” Specialized photography such as high speed or high contrast, generally does better in film, because there is more control. Also, moisture is not great for cameras and really bad for digital. Steamy damp rain forests might demand film instead of digital.
Interestingly, extreme cold is not ideal for digital as well. Another good rule is that if it hurts your eyes it may hurt the digital sensor. No bright welding shots.
Basically, digital rules the common need!
The real question is, “Can I complete a course in a digital photography class with the camera in my phone?” The answer is yes, depending. If the course covers basically photographic knowledge that may not be obvious in the controls of a phone camera. The phone is digital but it does not have all the digital aspects of a digital SLR.
The course can be completed, and the images can have all the necessary qualities, but the photographer will not have the full digital experience of capturing an image. What I have found is that most successful students upgrade their digital equipment to capture the images that they most like.
Sometimes photography is the amazing “opportunistic” images that occur because you are there, and you are ready with a camera. They occur everyday and you must be ready because the moment never lasts too long.
Most of photography falls into another category, the “intentional photograph”. This type of photo is well planned several hours, days, or months before the actual image is taken. The photographer develops a written plan, describing the intended image, and everything necessary to bring about the intended image. The plan should include specific equipment, time, light conditions, potential problems, access, permissions.
6 Steps to Planning a Photo Shoot — Be Your Own Art Director Series Part 1 | SLR Lounge
https://www.slrlounge.com/planning-your-shoot-be-your-own-art-director-part-1/
How to Plan a Photo Shoot
https://photographylife.com/how-to-plan-a-photo-shoot
6 Tips to Art Directing Your Best Photo Shoot
http://www.howdesign.com/design-creativity/photography/art-directing-tips/
A Designers Guide to: Planning a Photoshoot | Salad Creative
https://saladcreative.com/blog/the-designers-guide-to-planning-a-photoshoot
